Page 3 of 7 FirstFirst 12345 ... LastLast
Results 51 to 75 of 154

Thread: The Fear Monger

  1. #51


    Array
    Status
    Offline
    Join Date
    03-16-2011
    Posts
    3,822
    Location

    Sacramento, CA
    Vehicle

    1979 Dodge D-50
    Engine

    Chevy V6

    Building the class A mold part 3

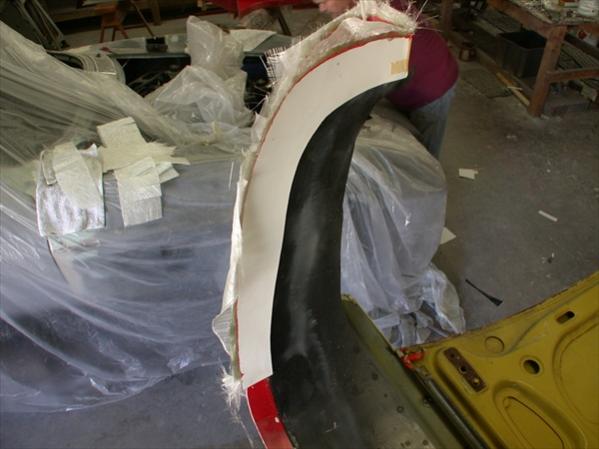
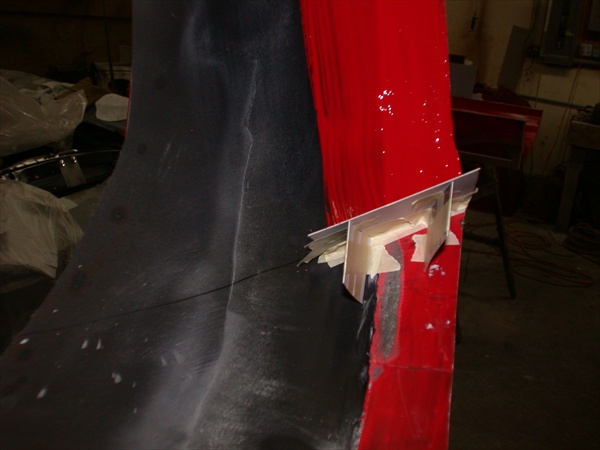
    Now that you have the first section of the mold done and some wood backing to help keep the mold rigid you can move on to the “Lock Up” areas as explained in step 2. So now you can flip the plug and mold over to get to the lock up areas.


    The process is the same. More wax; build out the flanges, and glass over with 4 layers.
    Once the glass has dried you can trim off the fringe with a cut off wheel or air hacksaw, and remove the paper flanges you made earlier.


    The next step is to make the return flanges.
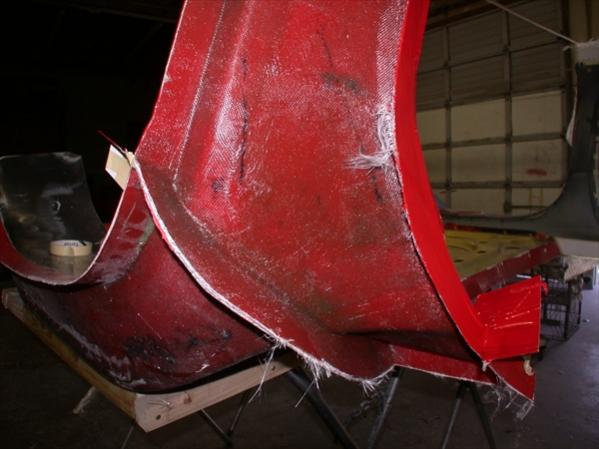
    This will give you an area to place the glass for the part. The return flange is one key part of the mold. It will give the final part the strength to keep flexing down to an acceptable level. With out a return flange the part will flap in the wind or sag. One misconception is a thick part is a strong part. Not so. But I’ll get into that later. Right now lets go forward on the mold flanges. Where you placed the flanges on the out side of the mold you need to carry that over to the return flange as well. Just keep thinking lock up. When the mold for the hood is done it will consist of 17 separate parts that will bolt together.


    Once you have the return flange separation points you can gel coat the plug, and mold flanges. Then glass on the 2-inch return flanges. One problem that people encounter is the mold sticking to the plug. You can reduce this by using the right amount of hardener. Not enough and the resin gets more time to work it’s way through the glass, gel coat and wax. Then the resin works it’s way into the plug or your flanges.
    Once you have all the flanges done you can get out the drill and ¼ inch bolts. You are going to need a bunch of them.

    Attached Images
    Last edited by camoit; 08-12-2020 at 11:13 PM.
    Members come and members go, But the board keeps track of them.
    Find me on FaceBook
    clicking HERE.

    Or look on YouTube Click Here.
    http://mobilemillwright.com

  2. #52


    Array
    Status
    Offline
    Join Date
    03-16-2011
    Posts
    3,822
    Location

    Sacramento, CA
    Vehicle

    1979 Dodge D-50
    Engine

    Chevy V6

    Building the class A mold part 4

    Ok so now your mold is finished and ready to remove from the plug. Well this is where you take all the time and money you spent on building the plug and toss it in the trash. Some times you get lucky and things just come apart and you get to reuse the plug. But some time you don’t. The bedsides came out of the mold with just a small amount of damage. But the hood well lets just say we won’t be reusing the plug any time soon. It started out OK but went down hill fast.

    DSCN4120.jpg DSCN4349.jpg


    10 hours later the mold was fine. But the plug was done. First you will need to fix any damage the mold may have received when you removed it from the plug. Normally that is along the flange areas. Grind down the damaged areas and build back up with Bondo and sand smooth.

    DSCN4304.JPG DSCN4299.JPG
    Members come and members go, But the board keeps track of them.
    Find me on FaceBook
    clicking HERE.

    Or look on YouTube Click Here.
    http://mobilemillwright.com

  3. #53


    Array
    Status
    Offline
    Join Date
    03-16-2011
    Posts
    3,822
    Location

    Sacramento, CA
    Vehicle

    1979 Dodge D-50
    Engine

    Chevy V6

    Building Parts.

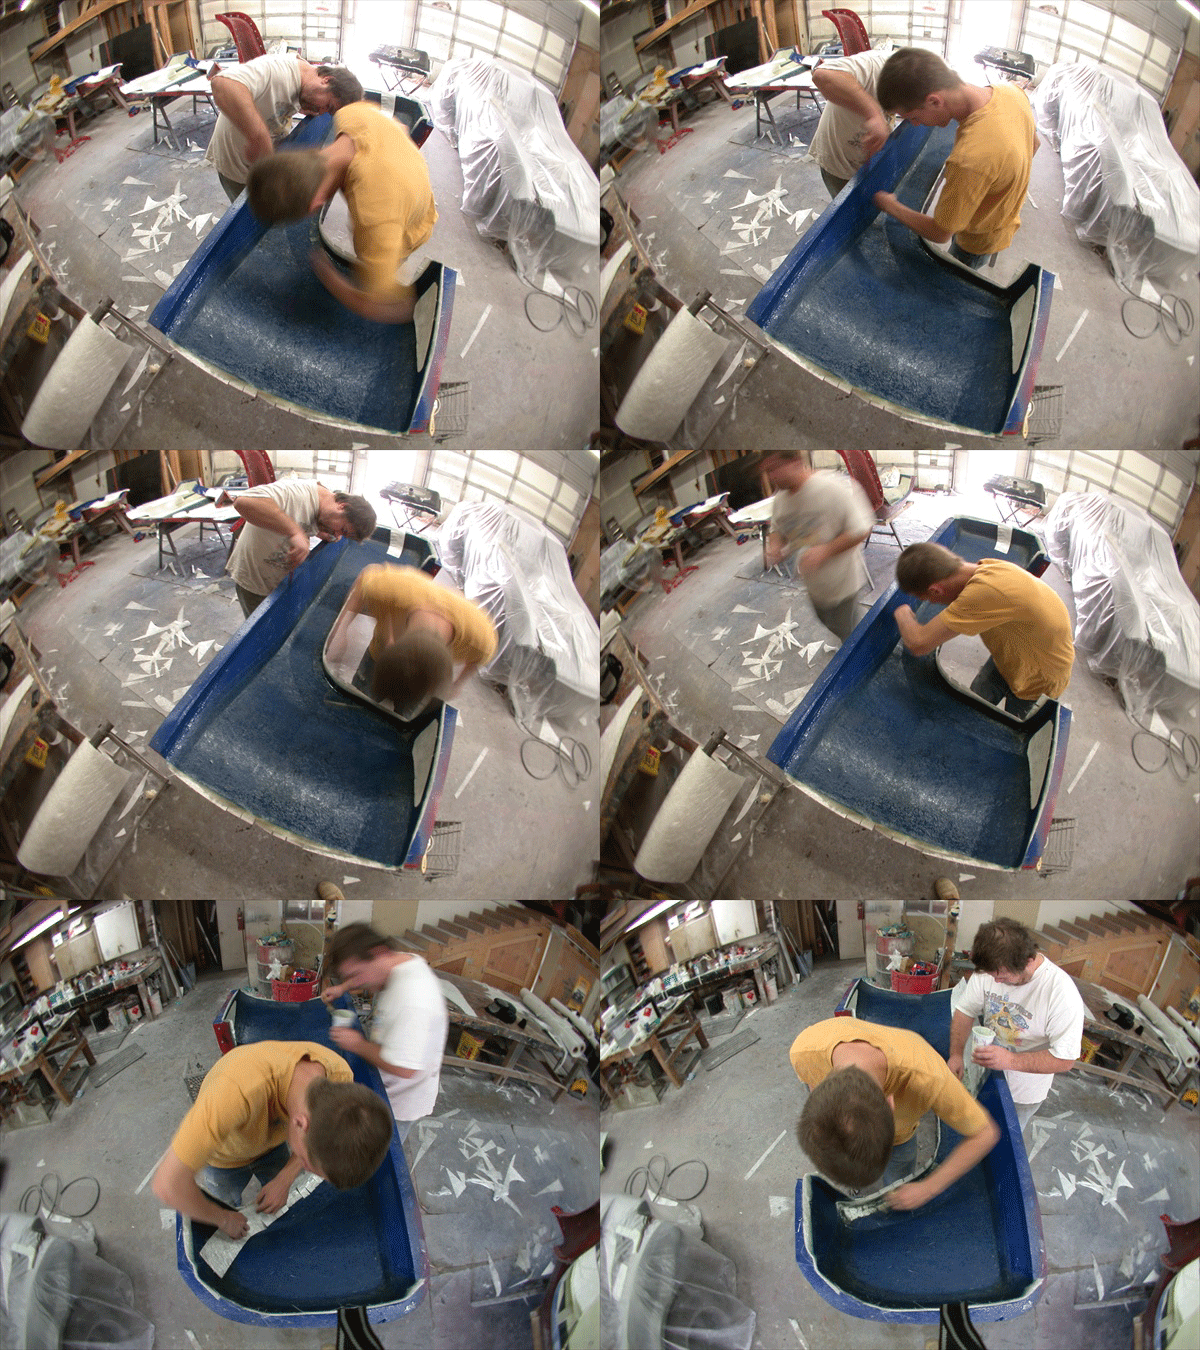
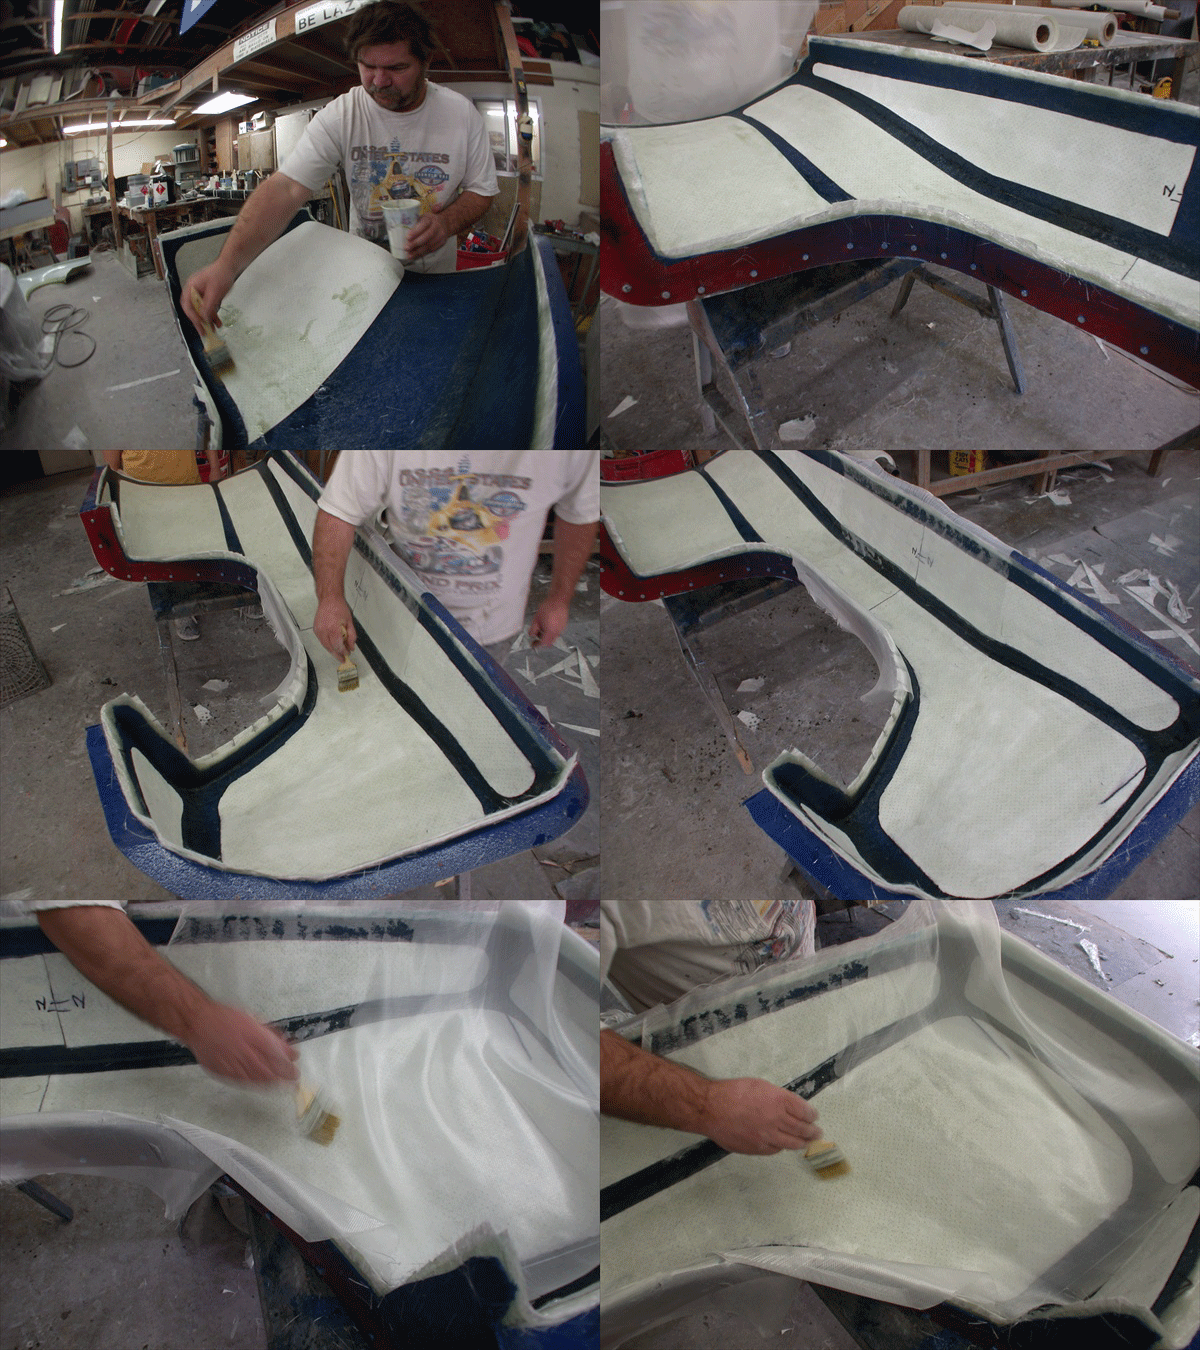
    Now we can start to build the parts. First you will trim and fit the fiberglass, just like building the molds. Next you need to cut and fit the “core mat” The core mat is what will give the fiberglass its strength.


    Core mat does not like to bend around sharp corners so it is used on the flat areas. The parts we are building are for use on the street so it will be 4 layers of glass with core mat used thought. If we were building pure race parts then we would use about half the amount of the glass cloth. After you have fitted the glass and core mat you can move on to prepping the mold. Now you mix hardener into your gel coat and spray the mold and allow drying over night. Only work in small areas just like before.

    First brush on some resin and apply your layers cloth fallowed up with lots of rolling.


    Next goes on your core mat and a final layer of cloth, fallowed up with just enough resin and brushing to lay everything down nice and flat.
    When applying your final layers and brushing on the resin, be careful not to put on too much. If too much is used then it will look wet and thick. Too much resin is just a waste of product and adds weight to the parts.


    Last edited by camoit; 06-09-2019 at 05:24 PM.
    Members come and members go, But the board keeps track of them.
    Find me on FaceBook
    clicking HERE.

    Or look on YouTube Click Here.
    http://mobilemillwright.com

  4. #54


    Array
    Status
    Offline
    Join Date
    03-16-2011
    Posts
    3,822
    Location

    Sacramento, CA
    Vehicle

    1979 Dodge D-50
    Engine

    Chevy V6

    Time to mount the body.

    On the rear bedsides I had to work around the nurf bars that are in front of the rear tires. (This is to keep the Honda cars away from the rear tires) I used a fiberglass splash to make the necessary cuts. Then used the splash as a pattern and transferred it to the bedside for the final cuts.


    Next comes the hard point mounting. I’m going to use an aircraft cam-lock to hold on the body parts.

    Here are some pictures of the body after some of the hard mounts are built.


    Attached Images
    Last edited by camoit; 08-12-2020 at 11:14 PM.
    Members come and members go, But the board keeps track of them.
    Find me on FaceBook
    clicking HERE.

    Or look on YouTube Click Here.
    http://mobilemillwright.com

  5. #55


    Array
    Status
    Offline
    Join Date
    03-16-2011
    Posts
    3,822
    Location

    Sacramento, CA
    Vehicle

    1979 Dodge D-50
    Engine

    Chevy V6
    Over the Christmas slow down I finally got around to building the jack mount and hold down. The mount is removable and is held in place with hose clamps and saddles onto the rear cage. The jack is held in place with a ratchet strap in 4 channels made from small box tubing with one side cut off.


    The tubing fit the jack rail nice and tight. It is kept from moving side to side with some little stops on each end of the jack. The handles are mounted with some through bolts and wing nuts. To keep them from rattling around I used a peace of hose between the tubing and handle on the mount bolt.

    DSCN4488.JPG DSCN4485.jpg
    Members come and members go, But the board keeps track of them.
    Find me on FaceBook
    clicking HERE.

    Or look on YouTube Click Here.
    http://mobilemillwright.com

  6. #56


    Array
    Status
    Offline
    Join Date
    03-16-2011
    Posts
    3,822
    Location

    Sacramento, CA
    Vehicle

    1979 Dodge D-50
    Engine

    Chevy V6
    After lots of time looking at the rear end I did decide to make a major upgrade and take a couple of steps backward. I decided to swap out the old trusty race proven trailing arms with new Camburg Engineering trailing arms. The are are bigger and more beefy so I don't think I will bend them any time soon. This just meant a complete re-work of the rear suspension system. I wans not looking forward to it but it's time to retire the old ones to a street car. I'll try to keep track of how many hours I put in to the re-work.
    Hours to day. 6

    02-08-12_2004.jpg 02-08-12_2007.jpg
    Members come and members go, But the board keeps track of them.
    Find me on FaceBook
    clicking HERE.

    Or look on YouTube Click Here.
    http://mobilemillwright.com

  7. #57


    Array
    Status
    Offline
    Join Date
    03-16-2011
    Posts
    3,822
    Location

    Sacramento, CA
    Vehicle

    1979 Dodge D-50
    Engine

    Chevy V6
    Add in another 25 hours. So thats around 31 now and I'm half way done. I need to buy a time clock..

    Time to get buzzy and swap out the old trailing arms with a new set from Camburg Engineering. These are just so much larger and now the shock sits deeper into the arm then the ones before. The one draw back is I had to swap out brand new Fox Shock rod ends with new longer ones, since the new arms are deeper. Now I will probably need to come up with a torsion bar type sway bar set up since the old bushing style arms have been removed. Bushing type are more stable then the Uni-Ball and hyme type.

    Here are the new arms. Arnt they pretty?


    Full Bump to full droop. 28” of travel is possible but I’m limiting it to 16” on the main suspension and 4” on the secondary for a total of 20”

    DSCN4520.jpg DSCN4521.jpg

    The location of the lower shock mounts are in a different place so that meant removing the upper mounts and relocating them.
    Last edited by camoit; 02-14-2012 at 11:32 PM.
    Members come and members go, But the board keeps track of them.
    Find me on FaceBook
    clicking HERE.

    Or look on YouTube Click Here.
    http://mobilemillwright.com

  8. #58


    Array
    Status
    Offline
    Join Date
    03-16-2011
    Posts
    3,822
    Location

    Sacramento, CA
    Vehicle

    1979 Dodge D-50
    Engine

    Chevy V6

    Camburg Sucks

    I'm up to about 90 hours of work now on the change over.
    After another week or 2 of work, the rear suspension is ready to install the shocks and run through the wheel travel one last time. Well the shocks don't fit into the trailing arms. There two narrow for the shock spacers. Time to call Camburg and see what they are going to do to fix the problem. (NOTHING)

    Well I had to send them out and have the spacer area milled to 1.50" just so the shocks would fit. They don't have any paint and the rod end bosses needed to be re-tapped. Customer service was useless. I'll never by anything from them again. WHAT A JOKE.


    In the mean time I finished up the final fitting of the stainless steel hard piping for the cooling system. Now they go out to get a bead roll put onto the end of the tubes so the hose does not slip off. Now I can finish off the carbon fiber air ducting for the radiator to draw air from where the rear window was.


    Last edited by camoit; 07-08-2012 at 05:09 PM.
    Members come and members go, But the board keeps track of them.
    Find me on FaceBook
    clicking HERE.

    Or look on YouTube Click Here.
    http://mobilemillwright.com

  9. #59


    Array
    Status
    Offline
    Join Date
    03-16-2011
    Posts
    3,822
    Location

    Sacramento, CA
    Vehicle

    1979 Dodge D-50
    Engine

    Chevy V6

    Time for an update.

    I finished up the suspension with the steering stabilizer. It’s a Fox 2” emulation shock absorber that has had the valving changed to a 50/50 valve, and only charged with 100PSI of Nitrogen.


    Here is the truck with about 90% of all the parts set in place. I’m getting ready to weigh it and figure out the spring rates for the coil over shocks. I should have all the parts on it and have the 4 wheel scales in about 2 weeks. After that it’s time to tear it down for the last time and send it out for powder coating and paint.

    weight1.jpg weight2.jpg weight3.jpg

    Members come and members go, But the board keeps track of them.
    Find me on FaceBook
    clicking HERE.

    Or look on YouTube Click Here.
    http://mobilemillwright.com

  10. #60


    Array
    Status
    Offline
    Join Date
    03-16-2011
    Posts
    3,822
    Location

    Sacramento, CA
    Vehicle

    1979 Dodge D-50
    Engine

    Chevy V6

    The Air Duct.

    Cooling system air duct system is now fitted. The air is drawn in through the opening where the rear window was. This will keep airflow through the cab even when stopped.

    It has taken about 8 months of design and 4 different ideas to come up with something I can live with. One of the main reasons to draw air from the cab is to keep exhaust gases out of the cab. I started with building a mold from foam and Bondo. Then building a mold from that. Then pulling the carbon fiber parts from the molds. Once I had the parts it was just a matter of trimming and mounting them.

    DSCN4675.jpg DSCN4682.jpg

    The main area of concern is where the hoses go into the radiator. It needed to cover the whole area so if a line was to come off under pressure it will keep the hot coolant from entering the cab area.

    Now it's on to the springs. I found a place that will build me the springs I need for the truck. I have been surprised on the customer service they have given me so far. http://www.purplespring.com Rob Fuller is the man I have been talking with. He is a Nascar owner and driver. They will be building the first trial set for me this week. They are sending me a set so we can start to get a base line for what is needed. If you need springs these are the new go to guys for me..


    .


    Members come and members go, But the board keeps track of them.
    Find me on FaceBook
    clicking HERE.

    Or look on YouTube Click Here.
    http://mobilemillwright.com

  11. #61

    Array
    Status
    Offline
    Join Date
    04-06-2011
    Posts
    483
    Location

    Jacksonville, FL
    Vehicle

    1990 Mitsubishi Mighty Max
    Engine

    G54B-T
    Bada$$ camo!

  12. #62


    Array
    Status
    Offline
    Join Date
    03-16-2011
    Posts
    3,822
    Location

    Sacramento, CA
    Vehicle

    1979 Dodge D-50
    Engine

    Chevy V6
    Today I start the full tear down to send this girl out to get her nails and hair done. Class A Powder Coating will do the work. They have the facility large enough to do the job. The first set of springs will be here next week sometime. Time to get this project finished up so I can start on version 2.
    Members come and members go, But the board keeps track of them.
    Find me on FaceBook
    clicking HERE.

    Or look on YouTube Click Here.
    http://mobilemillwright.com

  13. #63


    Array
    Status
    Offline
    Join Date
    03-16-2011
    Posts
    3,822
    Location

    Sacramento, CA
    Vehicle

    1979 Dodge D-50
    Engine

    Chevy V6

    Time for an update.

    Well the truck is now over at Class A Powder Coating.
    They have a nice place, plenty large enough to handle what ever you toss at them.


    They have 3 large drive through blast cabinets, 2 drive through down flow wet paint booths, 1 drive through indoor wet wash / degrees stall, 2 ovens and 2 powder coat stations.

    DSCN4696.JPG DSCN4701.JPG
    DSCN4690.jpg

    I don’t think there is much they can’t handle. When I took these pictures they were in the process of getting ready to powder coat twelve 60-foot aluminum palm trees. There big enough you could crawl inside them.

    DSCN4695.JPG DSCN4692.jpg


    Machine Shop Time.

    I need to have some new plates made for the coil over shocks. Fox and all their wisdom figured it’s not necessary to have a spring plate large enough to cover the entire spring seat areas. So I went to Try C Machine in West Sacramento.


    I'm going to have some spring parches and washers made up to fit the springs. This place has been around for years. If you want something made for a good price and get it done fairly quickly then this place is for you.
    Here they’re building some hydraulic cylinder heads. Now this is a drill press........

    DSCN4709.jpg DSCN4713.jpg
    DSCN4714.jpg


    Members come and members go, But the board keeps track of them.
    Find me on FaceBook
    clicking HERE.

    Or look on YouTube Click Here.
    http://mobilemillwright.com

  14. #64


    Array
    Status
    Offline
    Join Date
    03-16-2011
    Posts
    3,822
    Location

    Sacramento, CA
    Vehicle

    1979 Dodge D-50
    Engine

    Chevy V6

    All Powdered up.

    OK she is all powdered up and heading to primer. Should be ready to pick up after X mas.

    Here is the shop foreman getting the job done by putting fear into his people, Not....


    DSCN4819.JPG


    So first it goes to blast and gets the profile set and turned white.


    DSCN4764.JPG DSCN4790.JPG


    Next it gets the base coat and baked @ 385 for 40 minutes. Here she is hot out of the oven.

    !cid__12-19-12_1323.jpg


    Next comes the top coat of clear and metallic flake. Then back in the oven at a lower temp for another 40 minutes.

    !cid__12-19-12_1337.jpg !cid__12-19-12_1348.jpg


    The final finish with the blue metallic flake.

    DSCN4825.jpg

    Next she goes to the wet side to receive the cab primer and epoxy seal. From there it goes to the paint guy for the final top coating and body work.


    Here she is getting papered for primer.

    DSCN4820.jpg DSCN4812.jpg DSCN4817.jpg
    Last edited by camoit; 12-20-2012 at 05:14 PM.
    Members come and members go, But the board keeps track of them.
    Find me on FaceBook
    clicking HERE.

    Or look on YouTube Click Here.
    http://mobilemillwright.com

  15. #65

    Array
    Status
    Offline
    Join Date
    10-08-2012
    Posts
    371
    Location

    Cali
    Vehicle

    1988 Dodge Ram 50
    Engine

    G63B
    looks great so far. hopefully they hurry up and finish it already so u'll have it back at home where it belongs. gotta put that beast together! lol

  16. #66


    Array
    Status
    Offline
    Join Date
    03-16-2011
    Posts
    3,822
    Location

    Sacramento, CA
    Vehicle

    1979 Dodge D-50
    Engine

    Chevy V6
    Last edited by camoit; 01-14-2013 at 10:54 PM.
    Members come and members go, But the board keeps track of them.
    Find me on FaceBook
    clicking HERE.

    Or look on YouTube Click Here.
    http://mobilemillwright.com

  17. #67

    Array
    Status
    Offline
    Join Date
    01-06-2013
    Posts
    11
    Location

    nipomo, ca
    Vehicle

    1980 Dodge D-50
    Engine

    4G15
    i have a 1980 d50 and i want to make it a prerunner, yours is so sick man, how did you get the nissan front to work, seems like a good idea.

  18. #68

    Array
    Status
    Offline
    Join Date
    01-06-2013
    Posts
    11
    Location

    nipomo, ca
    Vehicle

    1980 Dodge D-50
    Engine

    4G15
    also i wanna see some videos of this beast when its running

  19. #69


    Array
    Status
    Offline
    Join Date
    03-16-2011
    Posts
    3,822
    Location

    Sacramento, CA
    Vehicle

    1979 Dodge D-50
    Engine

    Chevy V6
    Quote Originally Posted by 1980 d50 View Post
    i have a 1980 d50 and i want to make it a prerunner, yours is so sick man, how did you get the nissan front to work, seems like a good idea.
    I built the frame and just set the body on it. The problem is it's 1.5 foot wider then stock so nothing fits. I started with 4 empty jack stands and some string. Thats how it all started.


    frame2.jpg
    Members come and members go, But the board keeps track of them.
    Find me on FaceBook
    clicking HERE.

    Or look on YouTube Click Here.
    http://mobilemillwright.com

  20. #70

    Array
    Status
    Offline
    Join Date
    10-08-2012
    Posts
    371
    Location

    Cali
    Vehicle

    1988 Dodge Ram 50
    Engine

    G63B
    dang.. i work on the 2nd. but i'll be logged in to watch tho.

  21. #71

    Array
    Status
    Offline
    Join Date
    03-26-2011
    Posts
    409
    Location

    Portland, OR
    Vehicle

    1986 Dodge Power Ram 50
    Engine

    G54B
    Working on heading South for the 2nd/3rd. My son is up for the run, will see if finances allow it. Cashing out 2 weeks vacation, but I have some outstanding (ex wife) bills to pay off first.

  22. #72

    Array
    Status
    Offline
    Join Date
    12-03-2012
    Posts
    300
    Location

    Buckingham,VA
    Vehicle

    1992 Mitsubishi Mighty Max
    Engine

    4G67
    When are you going to work on my truck
    Last edited by camoit; 02-03-2013 at 12:03 PM.

  23. #73

    Array
    Status
    Offline
    Join Date
    10-08-2012
    Posts
    371
    Location

    Cali
    Vehicle

    1988 Dodge Ram 50
    Engine

    G63B
    Quote Originally Posted by 92bluemax View Post
    When are you going to work on my truck
    join the action in the chat room and via live cam from area 51. lol thats where the cool kids hang out

  24. #74


    Array
    Status
    Offline
    Join Date
    03-16-2011
    Posts
    3,822
    Location

    Sacramento, CA
    Vehicle

    1979 Dodge D-50
    Engine

    Chevy V6
    Quote Originally Posted by 92bluemax View Post
    When are you going to work on my truck
    I'll start on it when you get here. But it may take some time to get it all fixed up for you. If you get it here.
    Last edited by camoit; 02-03-2013 at 12:03 PM.
    Members come and members go, But the board keeps track of them.
    Find me on FaceBook
    clicking HERE.

    Or look on YouTube Click Here.
    http://mobilemillwright.com

  25. #75

    Array
    Status
    Offline
    Join Date
    10-08-2012
    Posts
    371
    Location

    Cali
    Vehicle

    1988 Dodge Ram 50
    Engine

    G63B
    Quote Originally Posted by camoit View Post
    I'll start on it when you get here. But it may take some time to get it all fixed up for you. If you get it here.
    one project at a time.. dont overwork urself. lol

Page 3 of 7 FirstFirst 12345 ... LastLast

Tags for this Thread

Bookmarks

Bookmarks

Posting Permissions

  • You may not post new threads
  • You may not post replies
  • You may not post attachments
  • You may not edit your posts
  •